

THE GREAT FELT ASMUSSEN
Everything you need to know for planning your felt project & purchasing the right felt as well as its processing & care - from A-Z
THE FELT ICON
Discover the most important tips and tricks for working with our felts! From the right preparation to useful hints for a perfect result – here you will find everything you need to know. Plus: An exciting puzzle that secures you a discount on your next order!


Interested in a commercial collaboration? Scan the QR code to learn more about our business terms and the partner program. Or register directly as a business customer . Follow us on social media to stay updated.
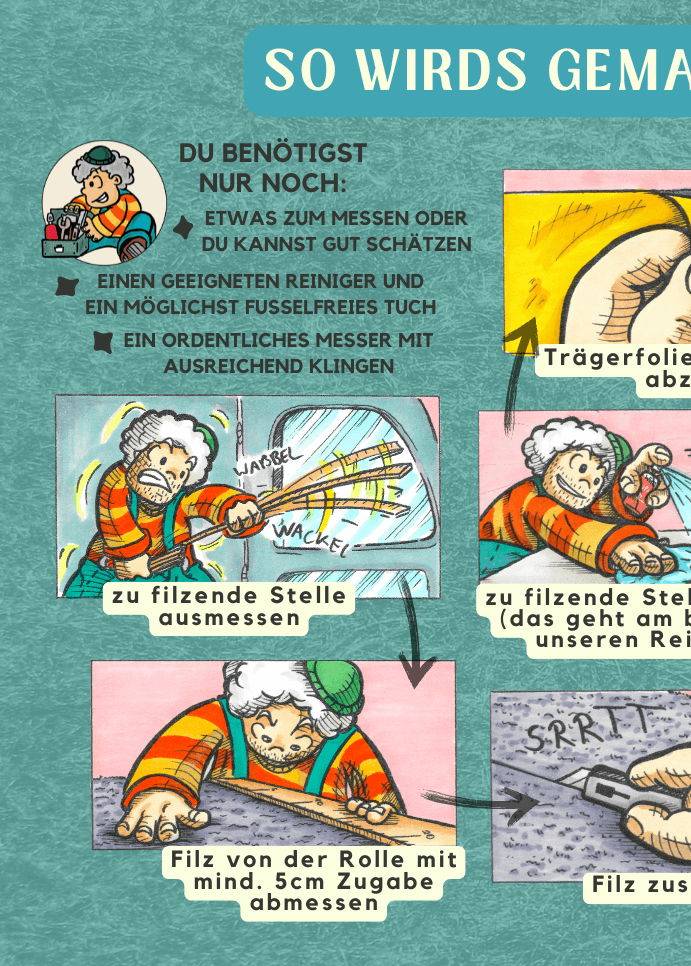
Here you will learn step by step how to professionally cover surfaces with felt. From precise measurements to assembly – this guide shows you how to do it while also bringing a smile to your face.
What do you need besides the felt? Cleaner & cloth, utility knife & blades. Let's get started!
Measure the part to be covered and cut the felt with an allowance of about 5 cm!
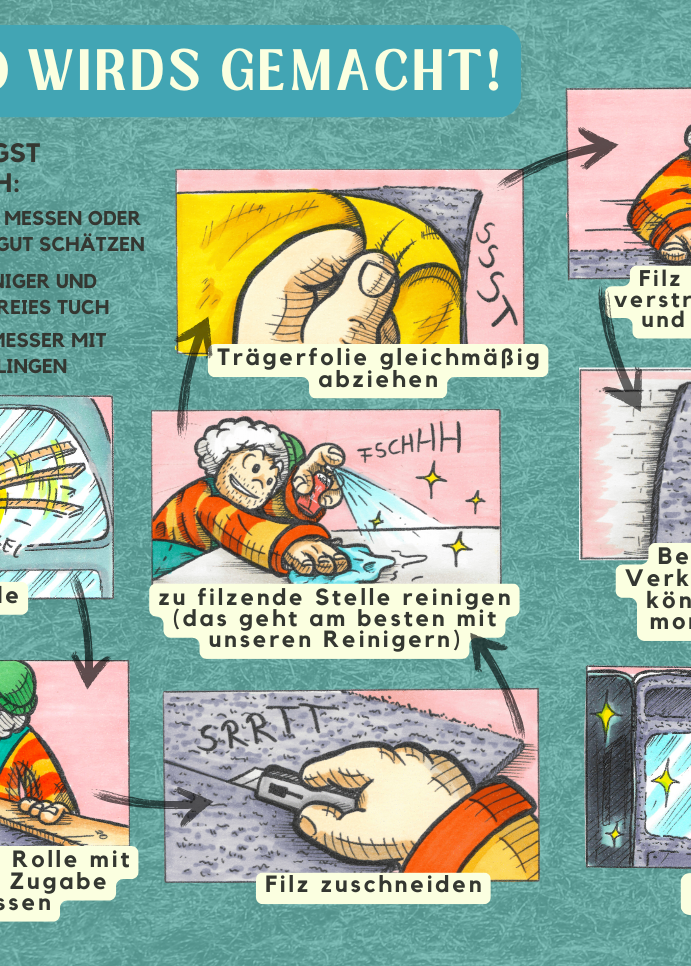
After measuring and cutting comes the cleaning! Before you start gluing, thoroughly clean the area to be felted, preferably with a suitable cleaner from our shop. You can stick our felts directly onto metal, wood, glass, many other materials, and even directly onto your insulation (Vanue, Armaflex, etc.). Then, evenly remove the backing paper from the felt, preferably only on one side, and make sure to position the felt well when pressing it down for the first time.
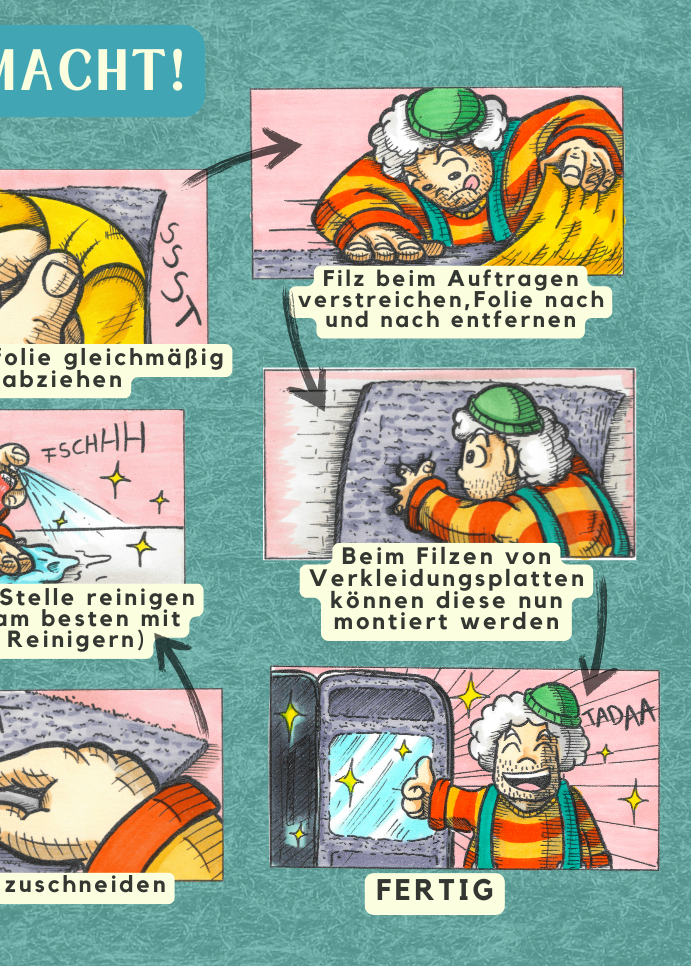
Carefully smooth the felt while applying it, gradually removing the carrier film to ensure an even and bubble-free surface. The gradual removal also prevents the felt from sticking anywhere it shouldn't!
Once the felt is perfectly in place, you can mount the covered panels. And with that, your project is successfully completed – done!

This image humorously illustrates what can go wrong when working with felt. Exaggerations like cutting with a chainsaw or using it as a parachute make it clear that felt should only be used correctly. Fun, but educational!
Interested in a commercial collaboration? Scan the QR code to learn more about our business terms and the partner program. Or register directly as a business customer . Follow us on social media to stay updated.
Here you will learn step by step how to professionally cover surfaces with felt. From precise measurements to assembly – this guide shows you how to do it while also bringing a smile to your face.
What do you need besides the felt? Cleaner & cloth, utility knife & blades. Let's get started!
Measure the part to be covered and cut the felt with an allowance of about 5 cm!
After measuring and cutting comes the cleaning! Before you start gluing, thoroughly clean the area to be felted, preferably with a suitable cleaner from our shop. You can stick our felts directly onto metal, wood, glass, many other materials, and even directly onto your insulation (Vanue, Armaflex, etc.). Then, evenly remove the backing paper from the felt, preferably only on one side, and make sure to position the felt well when pressing it down for the first time.
Carefully smooth the felt while applying it, gradually removing the carrier film to ensure an even and bubble-free surface. The gradual removal also prevents the felt from sticking anywhere it shouldn't!
Once the felt is perfectly in place, you can mount the covered panels. And with that, your project is successfully completed – done!
This image humorously illustrates what can go wrong when working with felt. Exaggerations like cutting with a chainsaw or using it as a parachute make it clear that felt should only be used correctly. Fun, but educational!